Self-Reporting
Who can do this:
- Anyone with editing permissions for Challenges, Homescreen (if selecting Availability), and Messages (if sending a message)
- Additional viewing permissions are needed for tied content (e.g., Forms, Media Collections)
Self-reporting allows you to set up a form that users fill out to verify they completed a Challenge. This is especially useful for offline activities; but a Challenge can be anything you choose, from swimming laps to reading a book.
Have users report on something through a form.
To create a Self-Reporting Challenge:
If you already created a form, skip down to step 2.
1. Open a new Challenge and select Self-Reporting for the Challenge type.
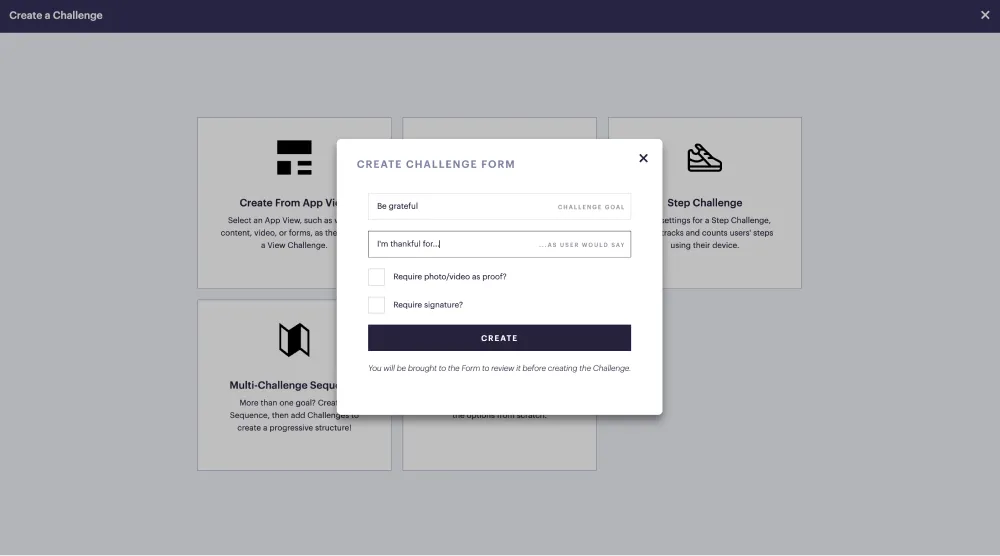
- A Create Challenge Form window opens.

2. Fill in form (pictured above) and click Create.
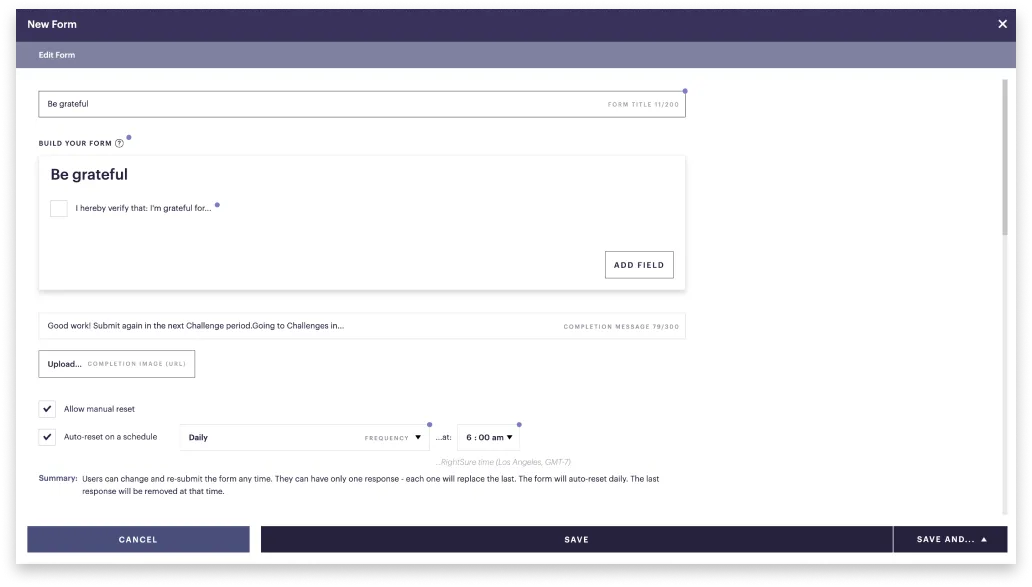
- The Edit form window opens. This is the form users complete to verify they have completed the goal.

3. The Form title is auto-filled with your Challenge Goal, which you can edit.
4. If you want, customize your form further. See Build a Form.
5. Use or edit the Completion message and add an image users will see.
6. (Optional) Select a form reset option:
- Allow manual reset: Allow users to make changes and re-submit the form any time up until the form closes.
- Auto-reset on a schedule: Allow users to resubmit the form according to the frequency you set. If a recurring Challenge, this will automatically be aligned with the period you set, e.g., if the period is daily, the form will reset every day.
What happens to previous form responses?
For either form reset option above, each user can only have one response. Any re-submissions replace the previous one. See View & export responses.
7. Set the Menu appearance and Availability.
Do I need to select a Display tag?
No, a Display tag isn’t necessary because the Challenge, along with the form, will already be visible in the dedicated Challenges section.
8. Continue to the steps below.
Use the form you created to set up a Self-Reporting Challenge.
1. In the bottom-right of the Form setup, select Save and create Challenge.
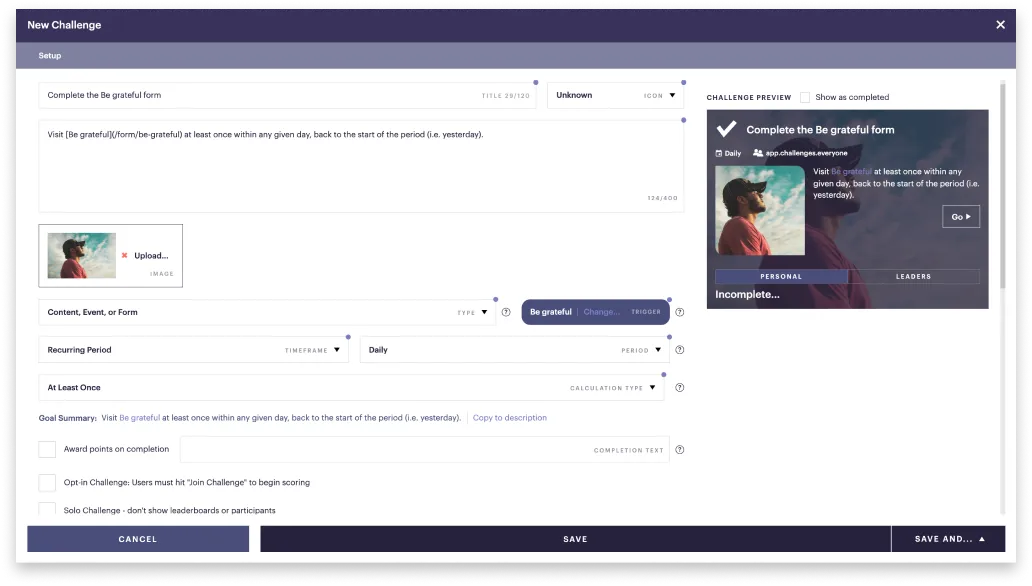
- A New Challenge setup window opens. The fields are auto-generated based on your form setup, which you can change.

Can I use an existing form?
Since scoring for recurring Challenges is retroactive, if you're using a form that was previously active, users will immediately get credit if they previously responded. If you want to avoid this, create a new form.
2. (Optional) Select Allow manual reset or Auto-reset on a schedule.
- If you selected Auto-reset on a schedule, a dialog let's you know the reset will be changed to align with a recurring Challenge. Click Okay.
3. Complete the Challenge setup fields.
4. In the bottom-right, select Save and close or Save and send message.
- If you opt to send a message, you'll be brought to the Compose page.
The Challenge is immediately published to the Challenges section of the app, unless you selected Hide/Show dates.
How do I edit the form later?
All forms connected to a Challenge can be accessed in your list of Challenges, in the Trigger column. Select it there to open the form and make any edits.
