Add an Event
Who can do this:
- Anyone with editing permission for Events, and the Homescreen, if selecting Availability and Display tags
Host a live video session, set up an in-person gathering, or create a virtual event.
Where do events appear in the app?
As long as you've added Events as a feature within your app’s layout, they will automatically display to users in both a calendar and list view. For steps, see Place features.
To add an event:
- Go to Events and click Add.
- Give your event a Name and Description.
- A unique URL slug is generated automatically—you can copy and use this to promote your event. Once saved, the URL cannot be changed.
- (Optional) Click Upload media to add a banner image.
- Select your Schedule, Location, and Attendance preferences, explained in more detail below.
- (Optional) Under Scheduling, set Hide/Show dates.
- If no dates are set, the event goes live right away and stays visible until you manually disable it in your Event list.
- Set the Availability and click Save.
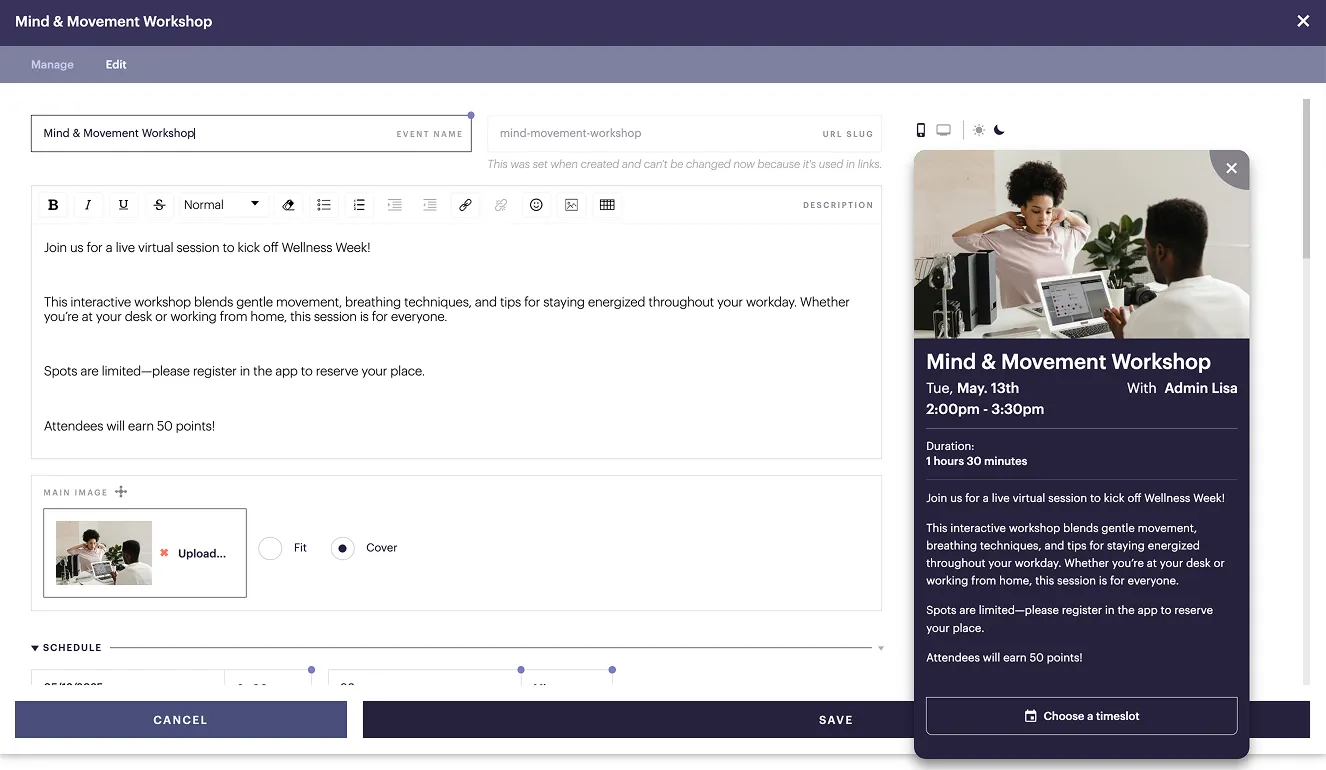
Your event can now be discovered by users in the calendar or list view.
Do I need to complete the Menu Appearance section and select a display tag?
No—only if you are featuring a specific event directly in the app. To do this, see Feature an Event.
Schedule
Select your schedule preferences:
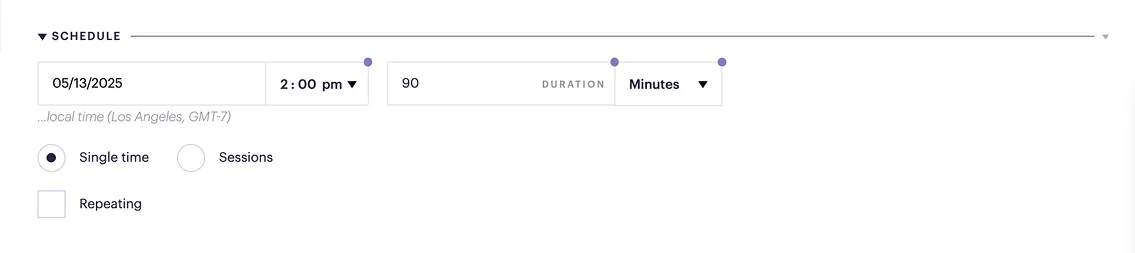
- Date, Start time, and Duration.
- Single time: One event with a fixed time.
- Sessions: This lets you offer time slots, and set the session duration and breaks in between.
- Repeating: Enable this if you want the meeting to recur. Then, select the frequency and end date.
Location
Choose the location:
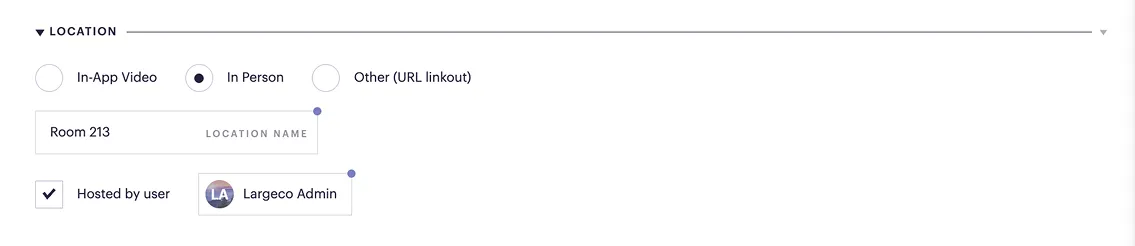
- In-app video: Host live video directly in the app (Group or 1-on-1) and assign a Host. You'll need to add the host as a user, if they're not already.
- In person: Select this to add a Location and a Host. This allows you to enable QR code check-in, in the Attendance section.
- Other (URL linkout): Add an external meeting link (e.g., Zoom, Teams).
Attendance
Set your attendance preferences:

- Signup required: Users must register through the app, in advance.
- Display # of signups to everyone: Users will see how many are signed up out of the total max allowed.
- Max signups: Limits the number of signups.
- QR checkin: Available when you've selected In-person under Location. If using this, Signup required must also be selected. Learn more at Launch QR check-in.
Do I need to turn on 'Signup required' for QR checkin?
Yes—each attendee must sign up first to generate their unique QR code for check-in.